Bump mapping is a technique used in computer graphics to simulate the grooves and reliefs of detailed textures on 3D object surfaces efficiently.
It is created from a grayscale image (called a “bump map”), where each pixel represents the direction of the surface normal of the object in relation to its original position. These direction values are encoded as colors and then applied to the 3D object, creating the illusion that the surface has raised details.
The lighting is calculated based on these normal direction information when rendering the scene, creating shadows and reflections on a flat and detail-less texture, giving it a more realistic appearance. The Bump map is always used in architecture as its use in rendering creates more realistic scenes!
Sumário:
Come learn how to create your own Bump Map!
1- Open in Photoshop the Disuffe Map (Seamless) without amendments of the desired texture!
Here on the site we have a blog teaching how to make this mapa!
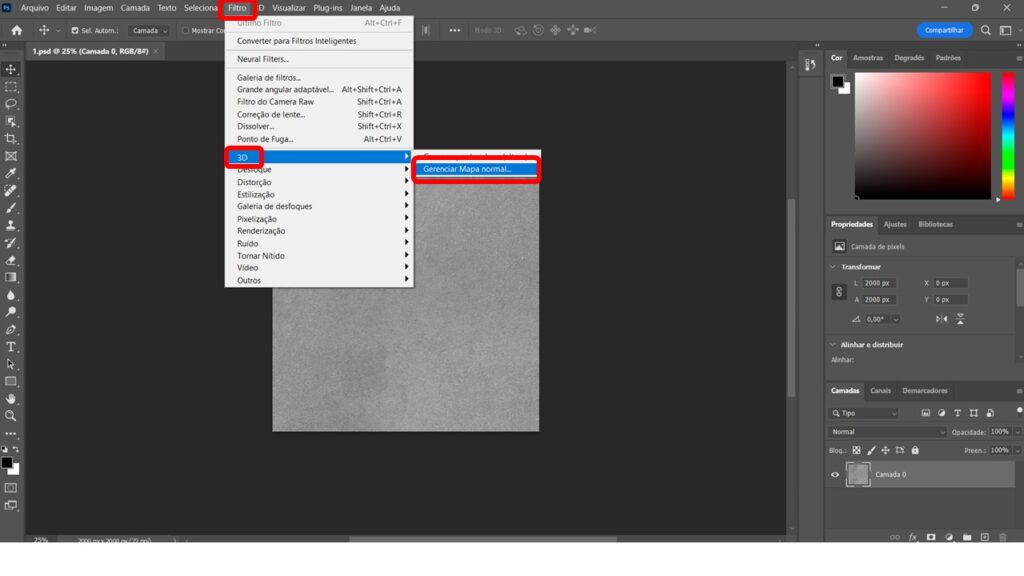
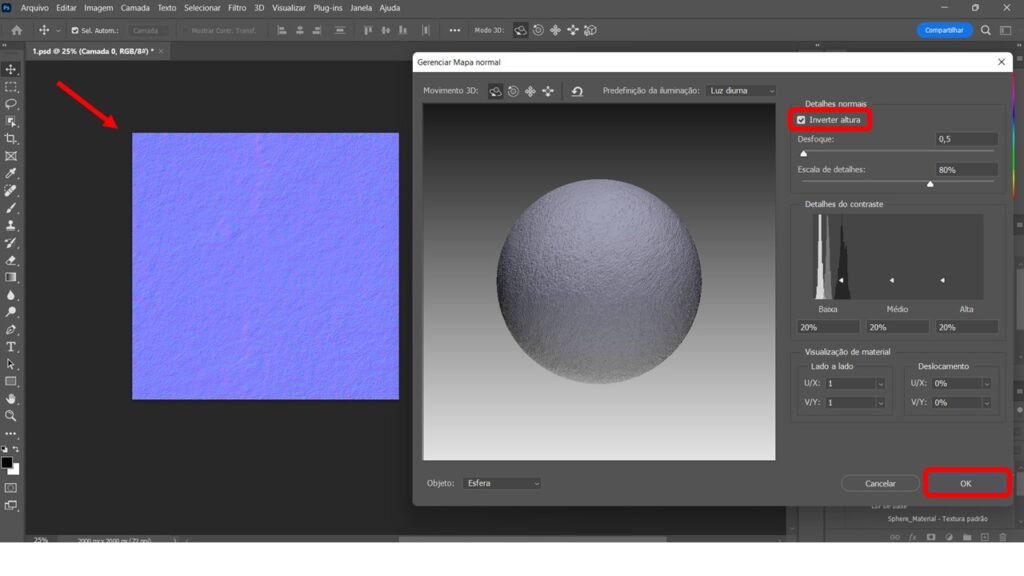
It is important to note whether the grooves of the relief are protruding or sinking into the texture, as the correct approach in most cases is for the relief to sink into the texture. If it is protruding and you want it to sink in (as in the demonstrated case of the concrete texture), you just need to click on the texture invert button and click OK.
Additionally, you can adjust the parameters that appear, such as blur and detail scale, as you prefer and find them coherent for that model.
2- Save Normal Bump Map
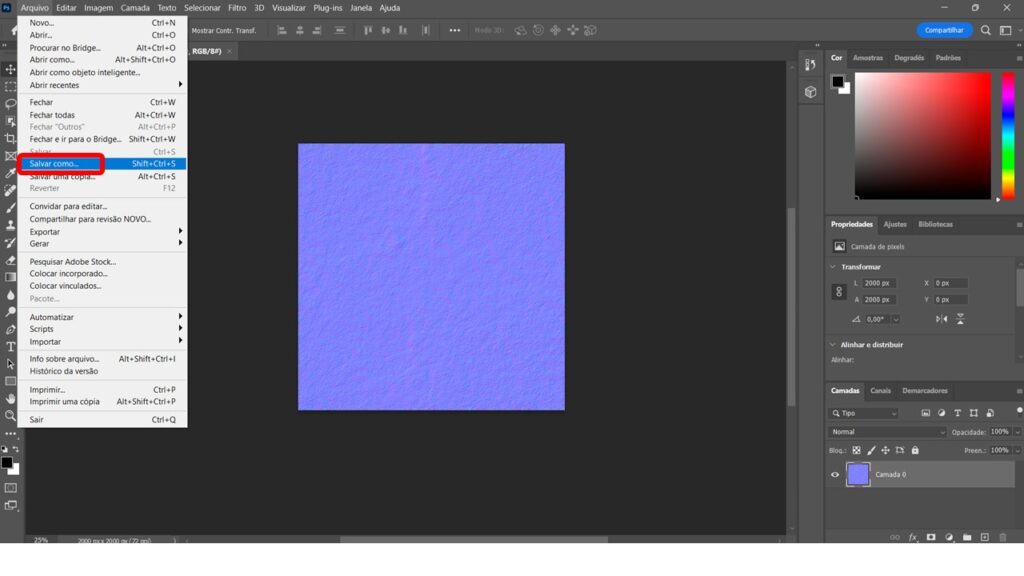
A recommendation when saving is to save in JPEG, JPG, or PNG format to maintain the texture’s quality! It is also possible to save with the TIF extension, which provides even higher quality but makes the file larger, potentially delaying or compromising subsequent rendering.
3- Your map is ready!
As a suggestion to facilitate the subsequent merging of maps, it is recommended to save the image with the texture initial_ map type, for example: WOOD_NORMALBUMP. This way, it will be easier to find the needed image!
Take a look at the difference between the two maps, the original and the Bump map:
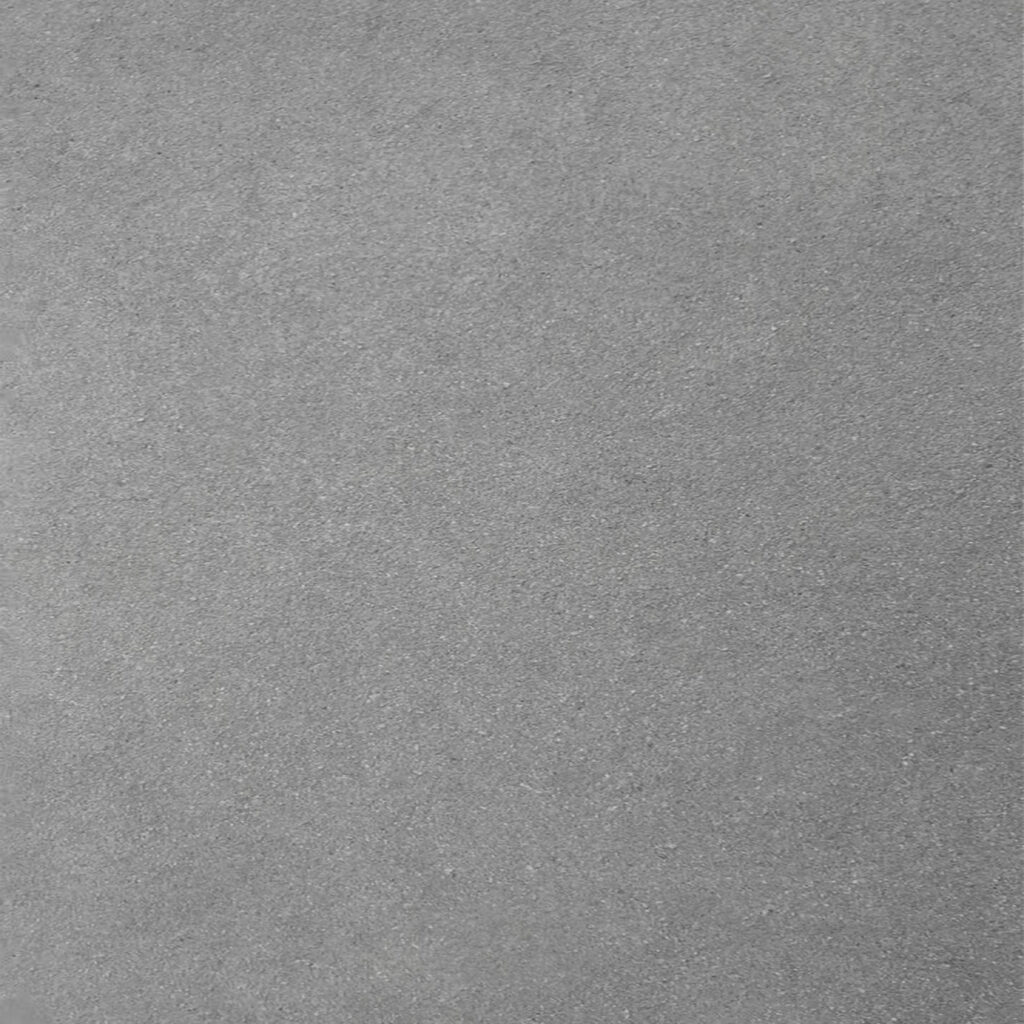
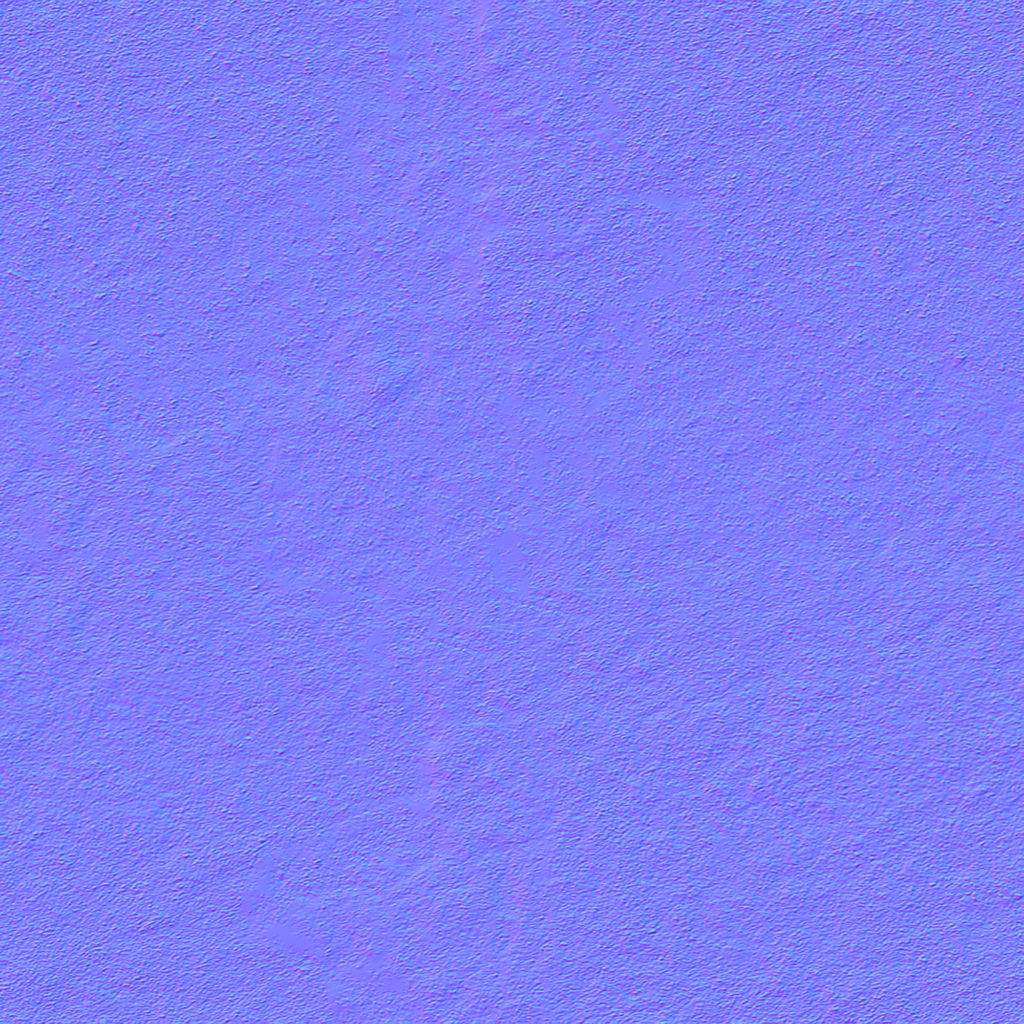
These two maps combined during rendering start to give characteristics to the texture, creating a uniform texture (diffuse) with reliefs (Bump). It is also possible to combine these maps with others, such as Gloss Map and Reflection Map, which we also teach in other blogs on this website!
Did you like the content? Follow more about, see the next blogs!


Somos um escritório de Arquitetura e Design de Interiores REMOTO que surgiu em 2023 do desejo de eternizar memórias e experiências com pequenos detalhes que fazem toda a diferença.
