
Learn through the tips below some basic settings that can help you use 3Ds Max more productively!
Sumário:
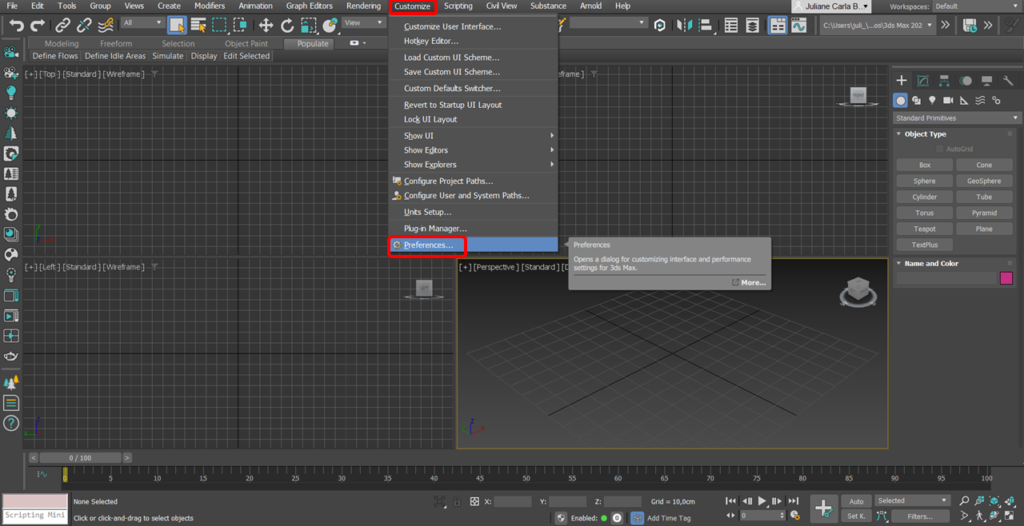
1- Undo (Ctrl Z)
It is important to define the limit of times that it is possible to execute the Undo command (go back) in a 3D file.
For that:
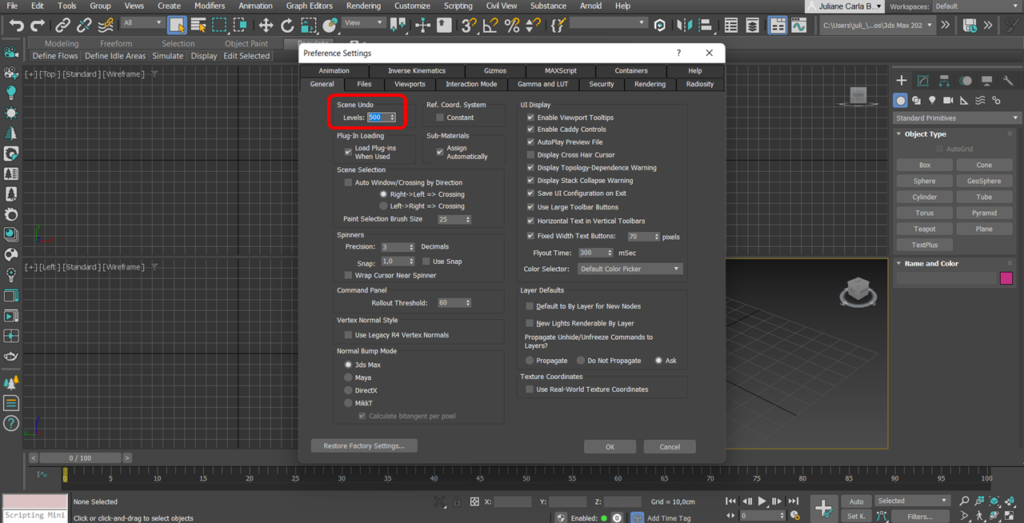
It will open the Preference Settings screen and in → General → Scene Undo Level → 500;
2- Comprimir o arquivo
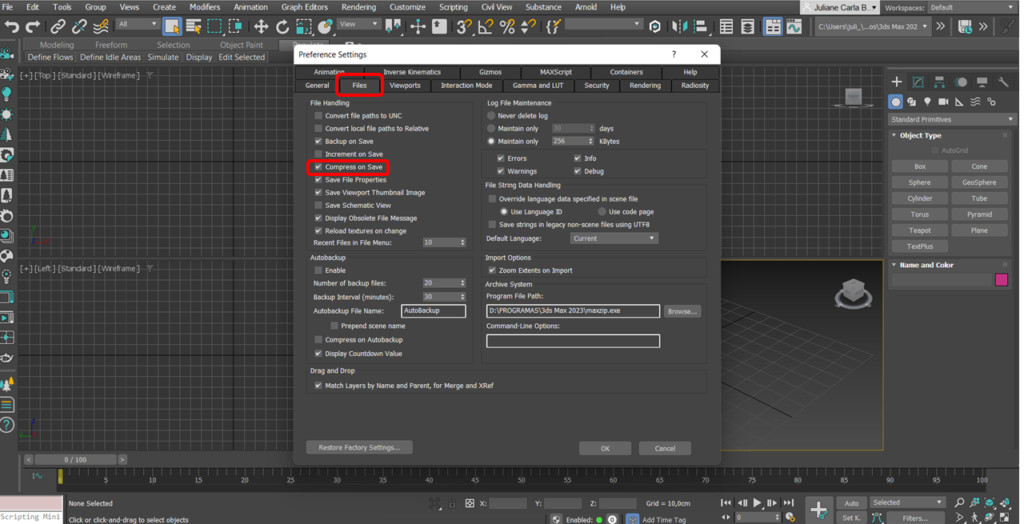
Enough:
- With the same Preferences Settings open, go to: Files → and activate the Compress on Save option.
3- AutoBackup
It is also important to activate Autobackup, this means that even if you forget to save the file for some reason, an automatic copy will be saved.
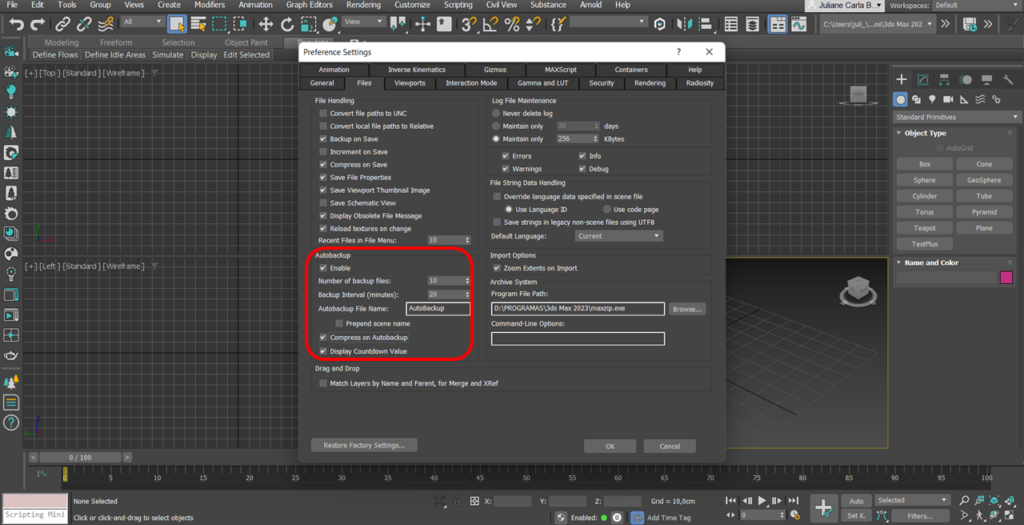
- After set the Number of backup files to 10; and the Backup Interval (minutes) to 20.
This means that every 20 minutes 10 backup copies will be saved in the software’s internal backup.
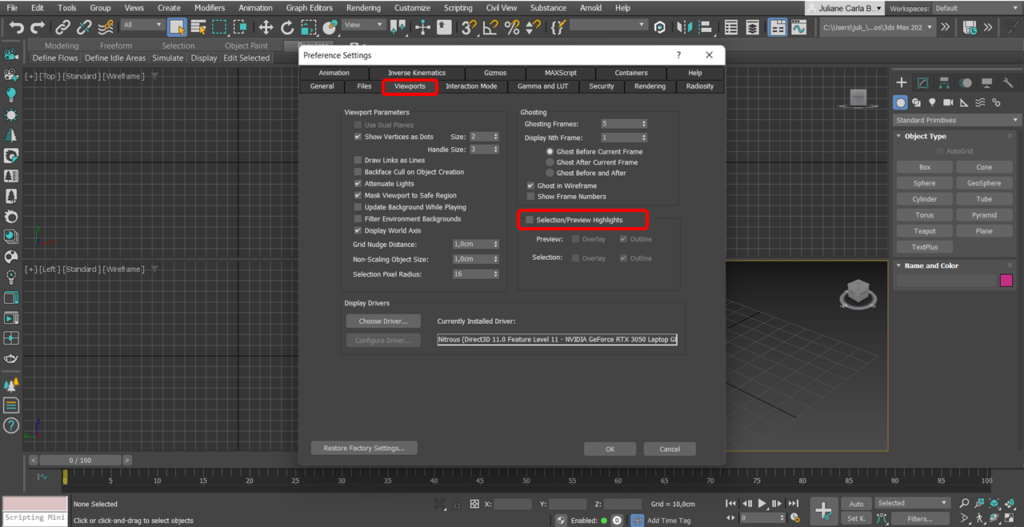
4- ViewPorts
In ViewPorts, just make sure that the Selection/Previem Highlights option is disabled, as this, in turn, ensures that when you hover the mouse over an object, it does not get a bright mark, which can get in the way when there are many objects in the scene. !
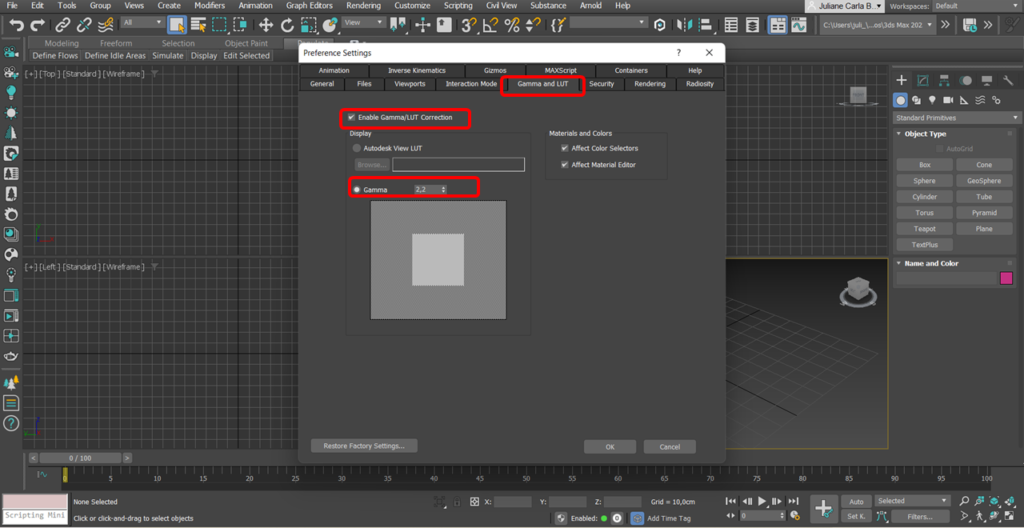
5- Gamma and LUT
In Gamma and LUT, make sure that Enable Gamma/LUT Correction is turned on and that with active Gamma it is set to 2.2.
6- View of Materials
To leave the Material Editor correctly configured, go to:
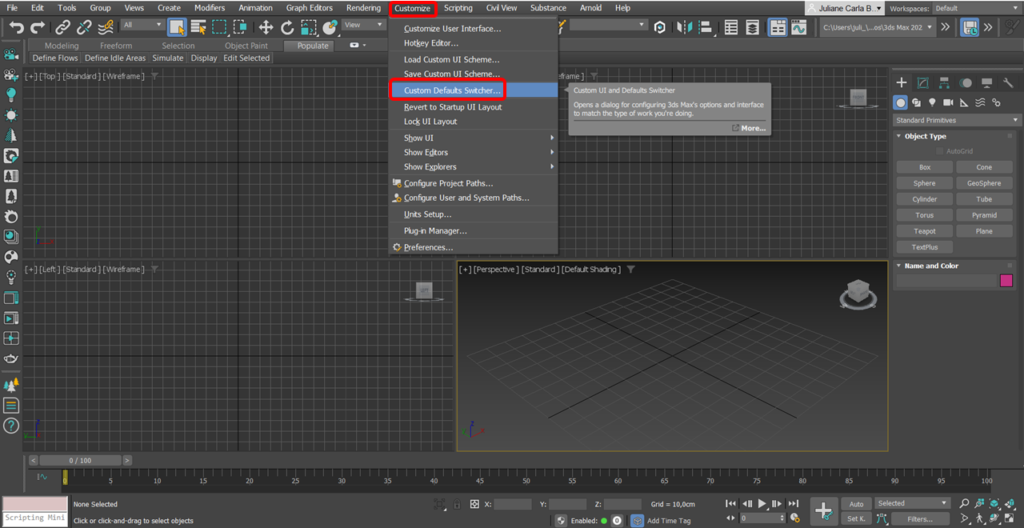
The screen shown in the figure below will open, where in Default setting: select Max.Legacy
And in User interface schemes: select DefaultUI
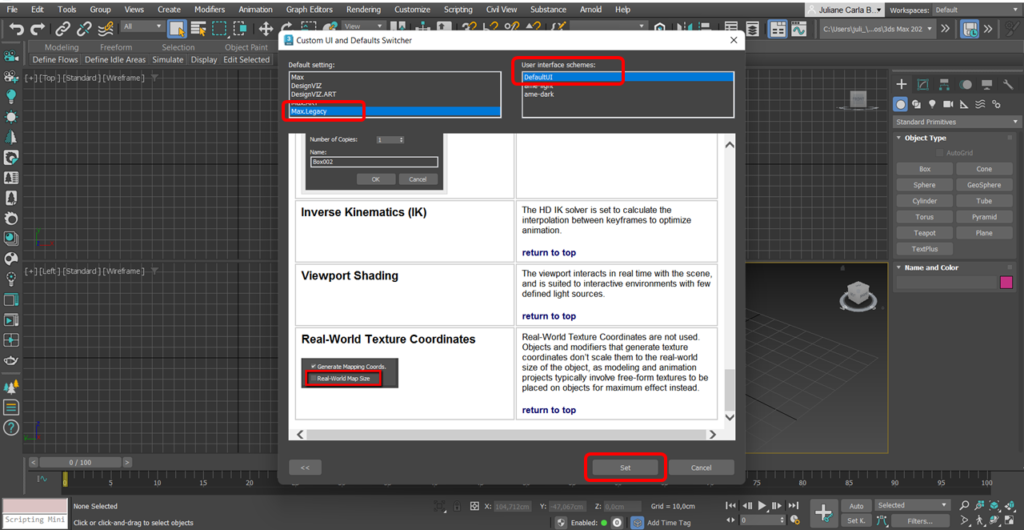
If the software crashes, it’s normal, just close and reopen 3Ds Max and everything will be back to normal.
7- Software Units
One of the most important settings is the drawing unit you will be working in.
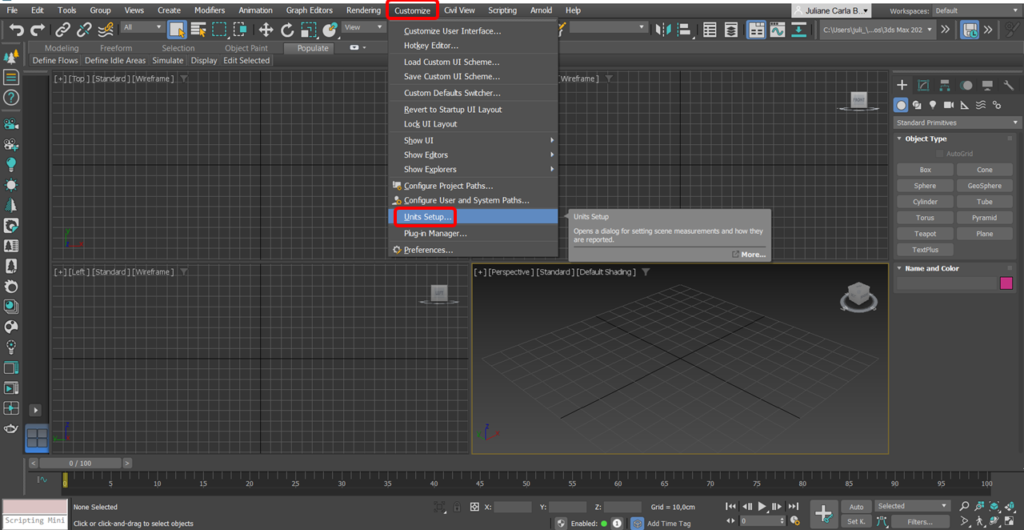
Select Metric → Centimeters, which is the drawing unit used in architecture. But it depends on your preferences and where you are.
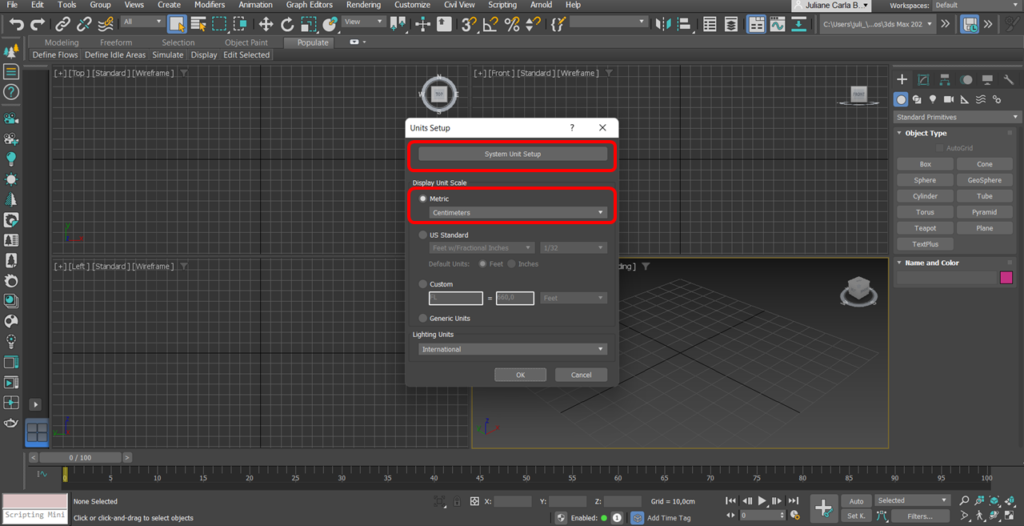
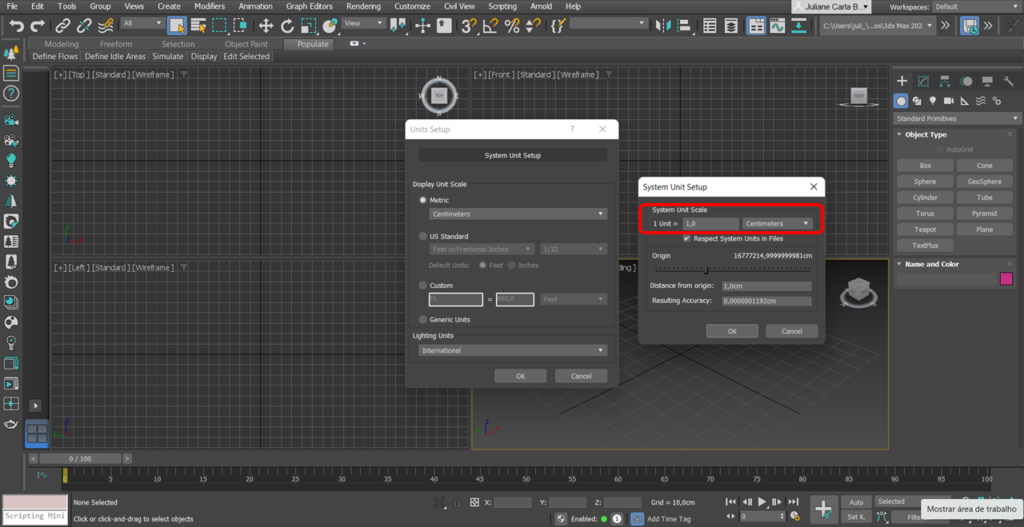
Still in System Unit Setup:
8- Object selection marking.
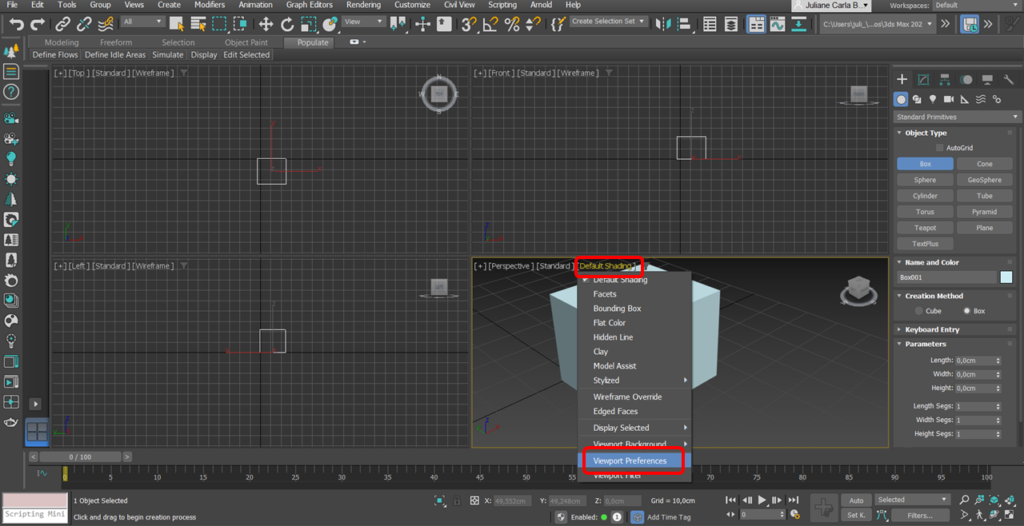
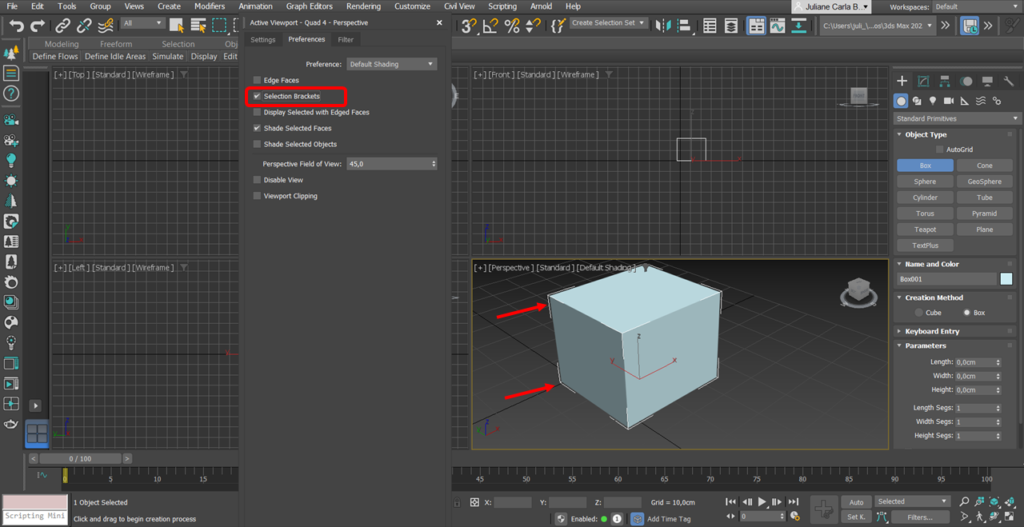
This action will activate the white lines around the selected object, showing that it is selected, this helps to better locate the objects within the scene.
Do you like the content? Follow more about, see the next blogs!
Somos um escritório de Arquitetura e Design de Interiores REMOTO que surgiu em 2023 do desejo de eternizar memórias e experiências com pequenos detalhes que fazem toda a diferença.