

The IES (Illuminating Engineering Society) is a file developed by an organization that publishes lighting-related standards, which contain the actual light information from lighting manufacturers!
When a manufacturer creates a new luminaire, depending on the shape of the interior of the luminaire after the light emission, its reflections create different types of light trails emitted through that object.
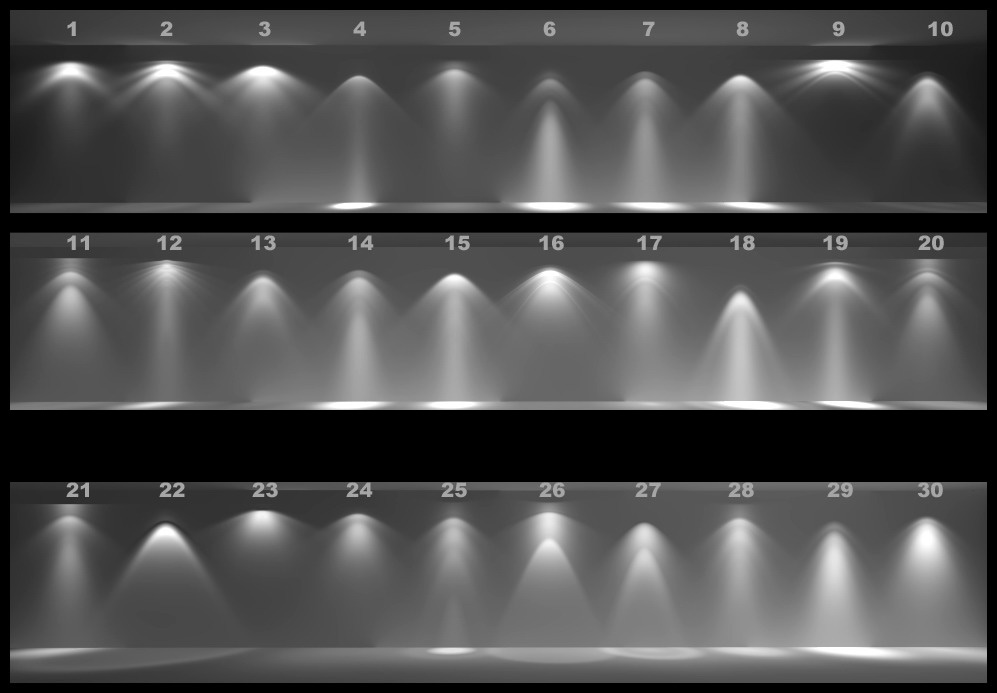
See this exemplified in the image below:
How to apply IES to a Corona Light in 3Ds Max?
Applying IES is very simple:
- You must select the created Corona Light. To make your selection easier, in the top bar instead of selecting All, just select Lights.
- With Light selected in your settings on the sidebar, scroll down and look for the IES option.
- It is important to ensure that it is on and by clicking next to the on tab you can open your files and find the IES mode you want to apply!
By default, Corona will already open the folder with your models that are already added, this way you can open and test which one you like best to use!
IES files are commonly used in lighting design software to simulate the performance of lighting systems in architectural or engineering projects. They contain photometric data that describe how much light is emitted in different directions from a light source, which is useful for determining how light will be distributed in a space and how it will meet the lighting requirements of the project.
Do you like the content? Follow more about, see the next blogs!


Somos um escritório de Arquitetura e Design de Interiores REMOTO que surgiu em 2023 do desejo de eternizar memórias e experiências com pequenos detalhes que fazem toda a diferença.