Want to add a specific background to appear outside the window in your scene without having to add a Sky Environment?
There is an easy and quick way to apply the theme you want and I’ll show you in this blog how!
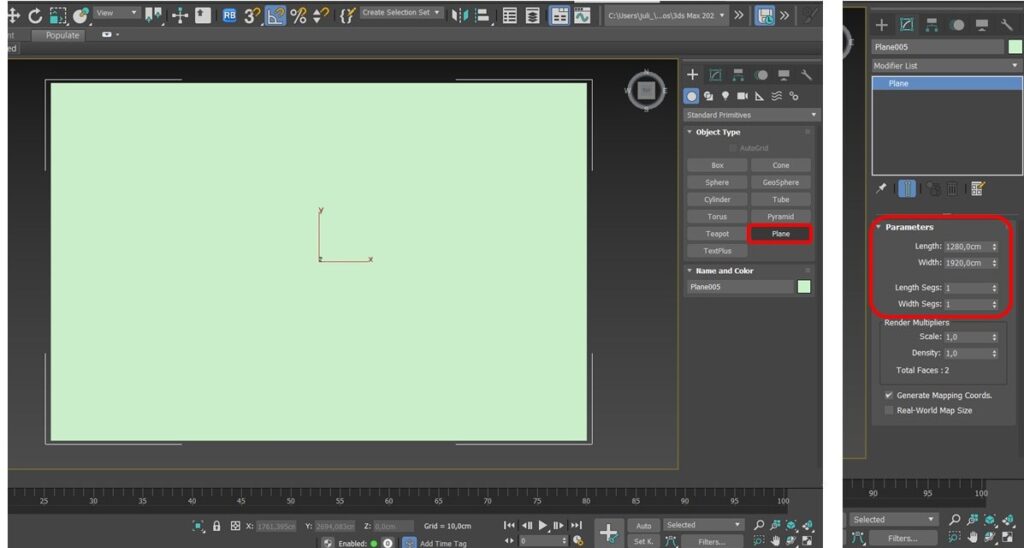
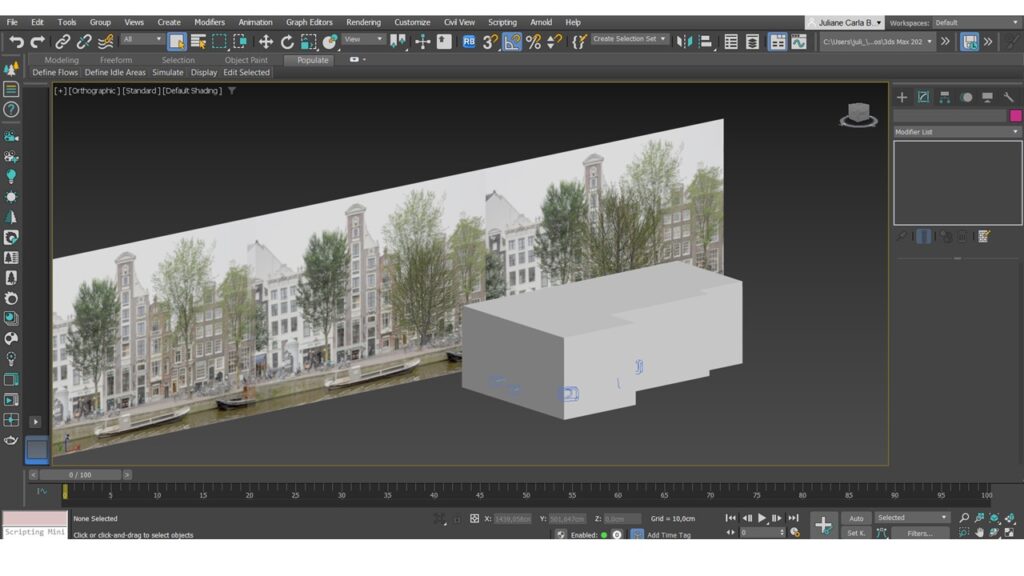
1- Create a Plane in the scene and adjust its parameters to those of the same image you will use!
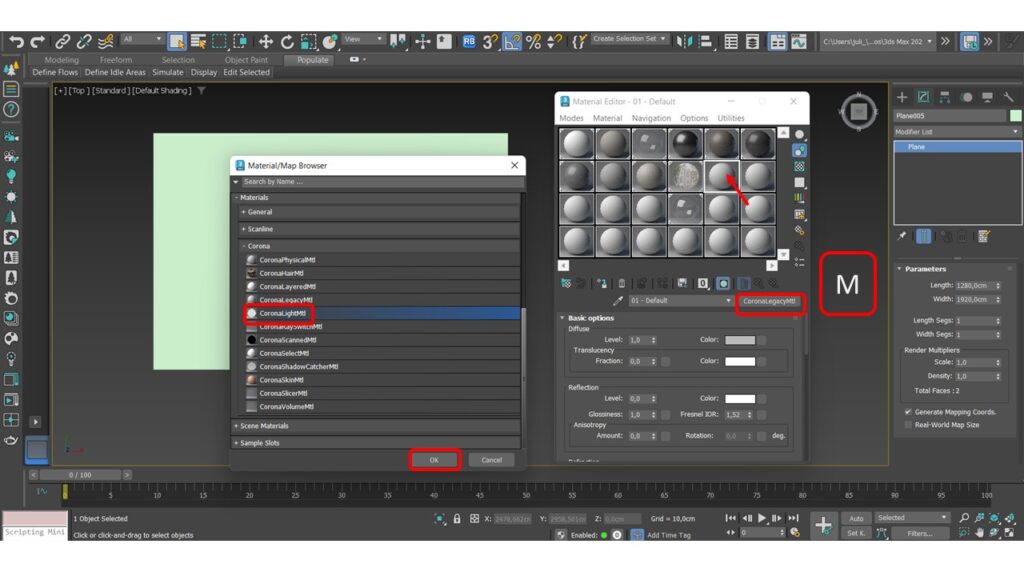
2- No editor de materiais crie um Corona Light Material
The M key opens the 3Ds Max Material Editor:
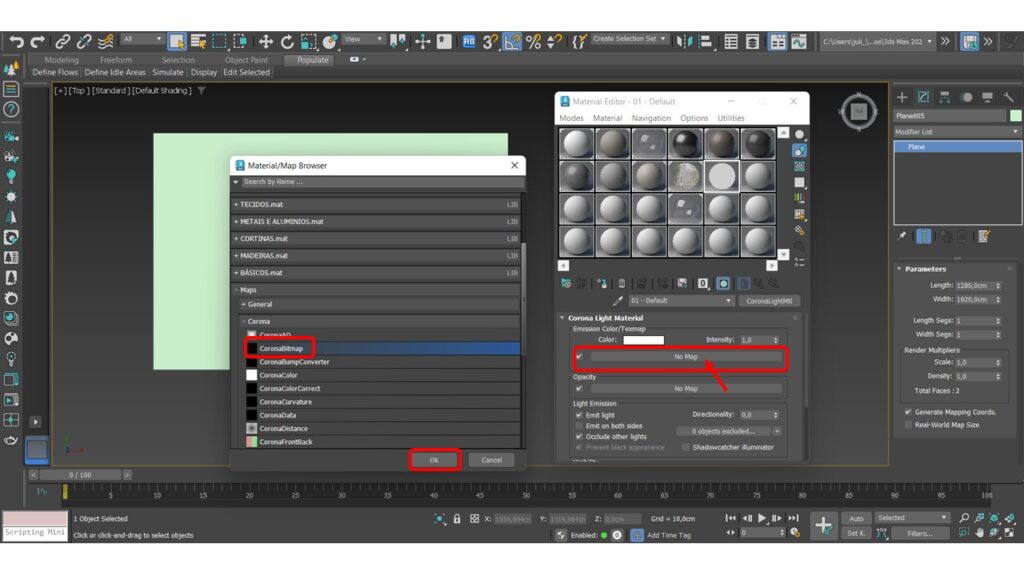
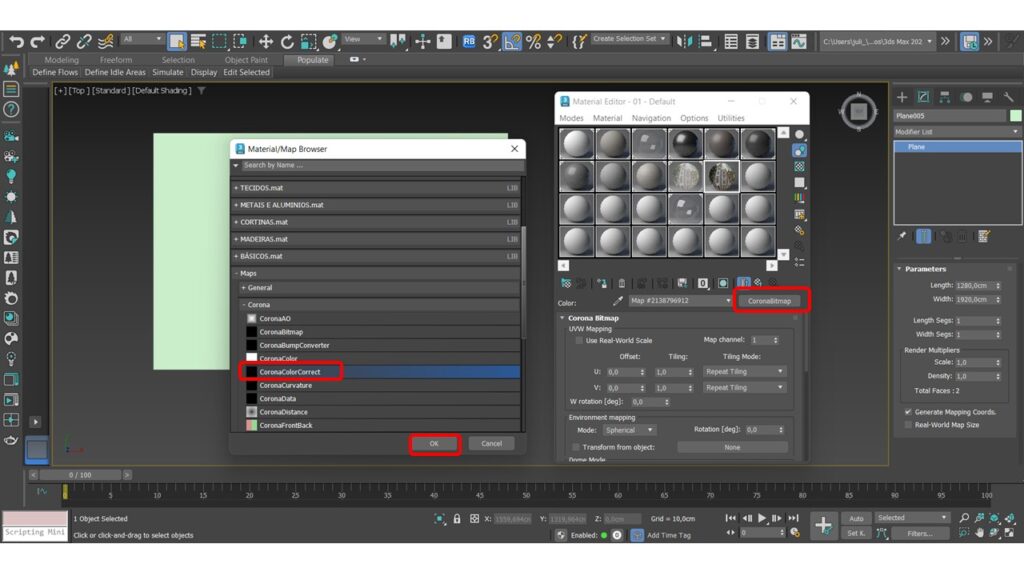
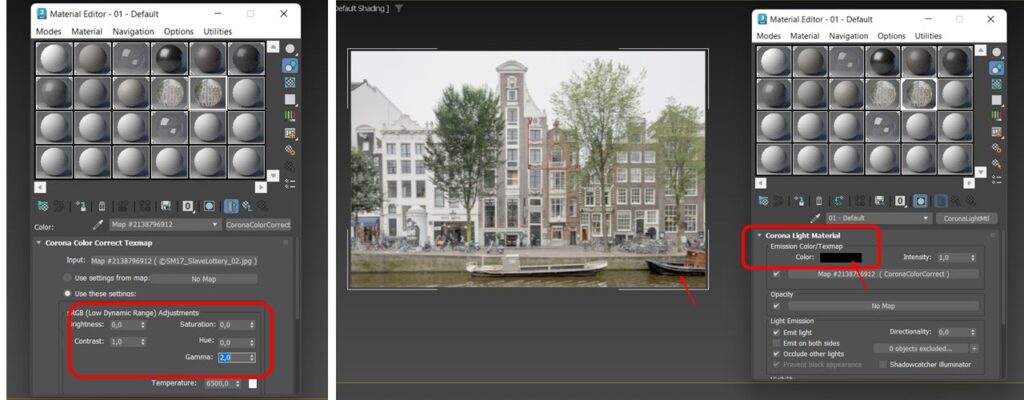
- In the corona color correct we can adjust the gamma to 2 for example to smooth the image more, making it more realistic in the rendering.
Still going back to the initial Corona Light Material texture, so that you can see the image in the plane, just change the indicated color from White to Black.
3- Now just adjust your image to the scene!
Do you like the content? Follow more about, see the next blogs!

