The creation of 3D textures can be a complex process that requires mapping, skills, and technical knowledge in image editing and 3D modeling. With practice and understanding the step-by-step process, it is possible to experiment with different techniques to achieve the best possible result.
Sumário:
To merge maps and create a 3D texture, you will need to follow these steps:
1- Choose the maps:
Select the maps you want to merge to create the 3D texture. These maps can include color maps (Diffuse), normal maps (Normal Bump), reflection maps (Reflect-Glossiness), displacement maps (Displacement), among others that may be necessary. In this case, we will use a concrete texture map as an example!

2- Open 3Dsmax:
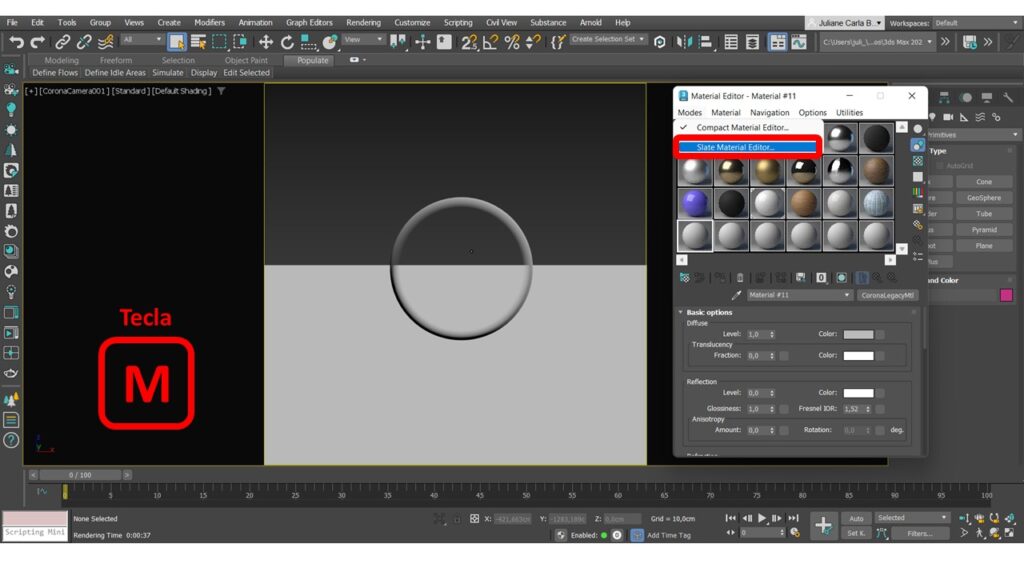
3- Configuration of the Diffuse Map (color map)
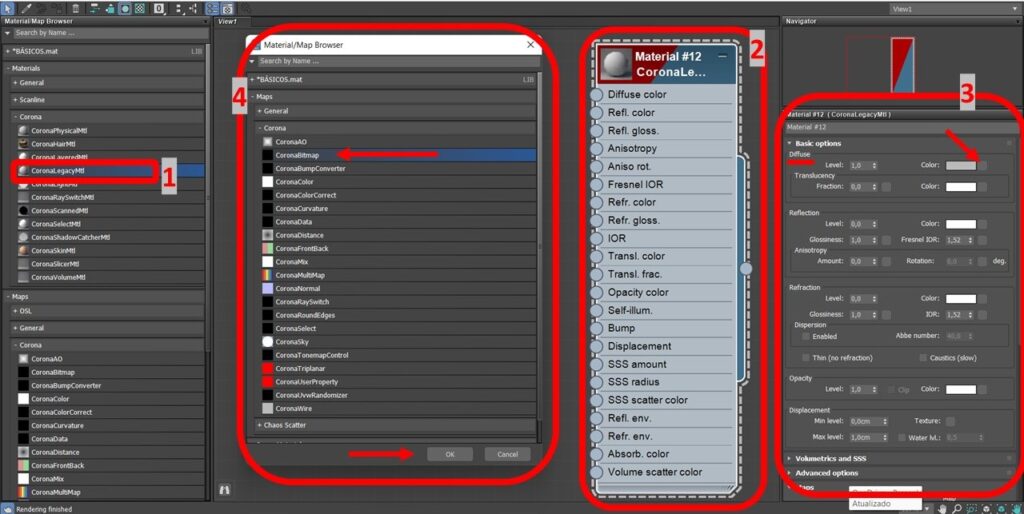
Follow steps 1 to 4 where:
- 1 – MATERIALS → CORONA → CoronaLegacyMlt;
- 2- WILL OPEN THE MATERIAL;
- 3- DIFFUSE → COLOR (CLICK ON THE SQUARE ▢ )
- 4- In MAPS → CORONA → CORONA BITMAP → OK
With this action, the screen of your computer’s files will open to search and select the created image of the Diffuse Map!
4- Glossiness Map Configuration (gloss map)
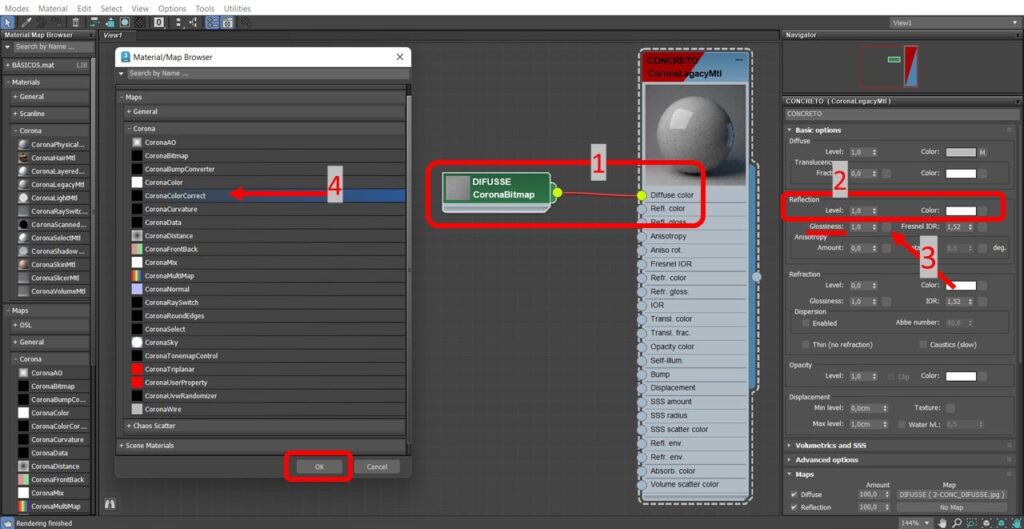
Follow steps 2 to 4:
- 2- In Refraction, change the level from 0 to 1.0 (this will bring maximum brightness to the texture through the color white).
- 3- Just below, you will find Glossiness written, keep the Level at one and click on the square ▢ next to it, it will open screen number 4.
- 4- In this one, you should select the option MAPS → CORONA → CORONACOLORCORRECT → OK.
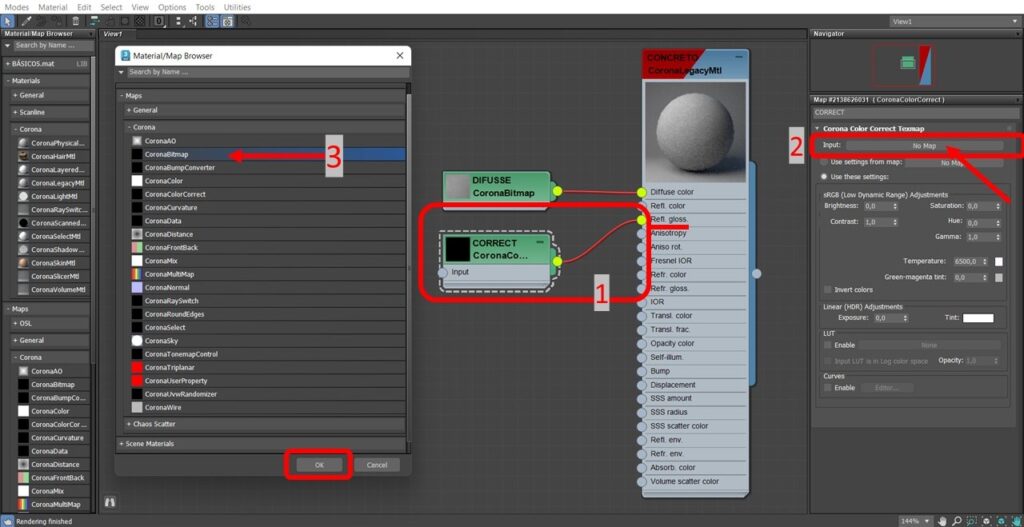
- 2- With Correct selected, go to Input and click on NO MAP. It will open tab 3.
- 3- In tab 3, go to MAPS → CORONA → CORONA BITMAP → OK.
- Still below, if you desire more brightness in the texture, change GAMMA from 1.0 to 2.0, this will give an extra highlight.
Once again, your computer’s files will be opened so that you can look for the map created by Glossiness.
5- Normal Bump Map Configuration (relief map)
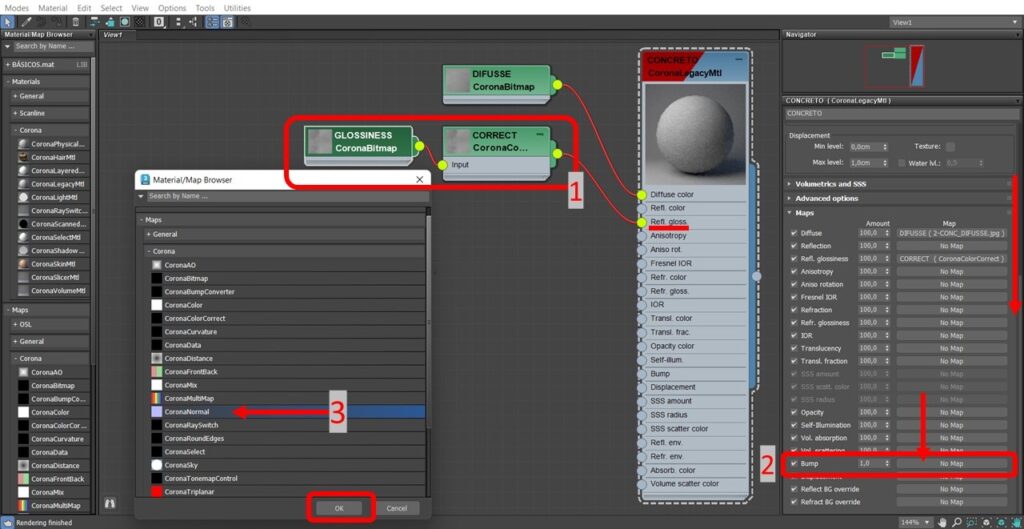
- 2- In the Concrete texture, slide the side bar until you find the BUMP item → click on NO MAP.
- 3- Tab 3 will open where in MAPS → CORONA → select CORONA NORMAL → OK.
The Corona Normal will be connected with the Bump as shown in 1 in the image below:
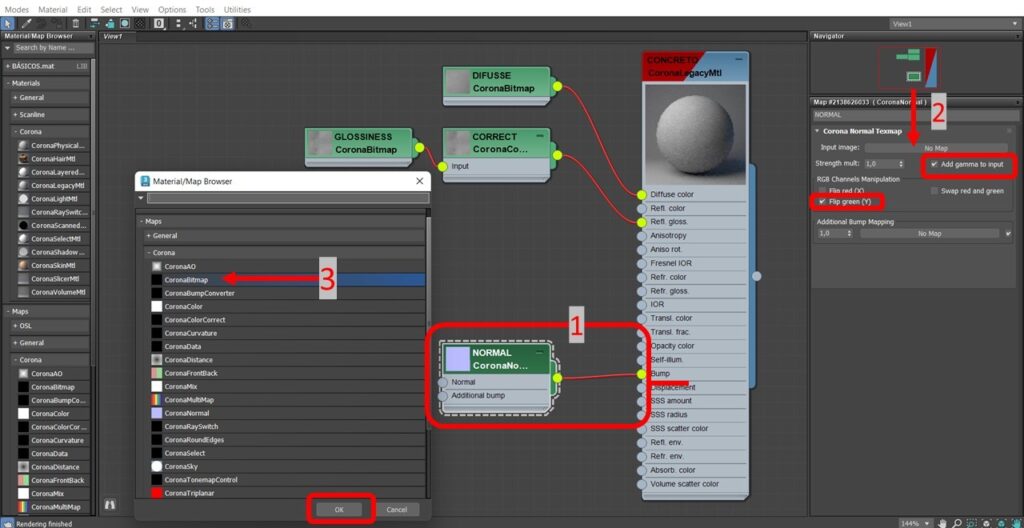
- 2- With Corona Normal selected as 1, go to Corona Normal Textmap, select the options ADD GAMMA TO INPUT and FLIP TO GREEN (Y), then click on NO MAP next to INPUT IMAGE.
- 3- MAPS → CORONA → CORONA BITMAP → OK. And then in your files, it will search for your created Normal Bump map!
6- Configuration of the Displacement Map (displacement map)
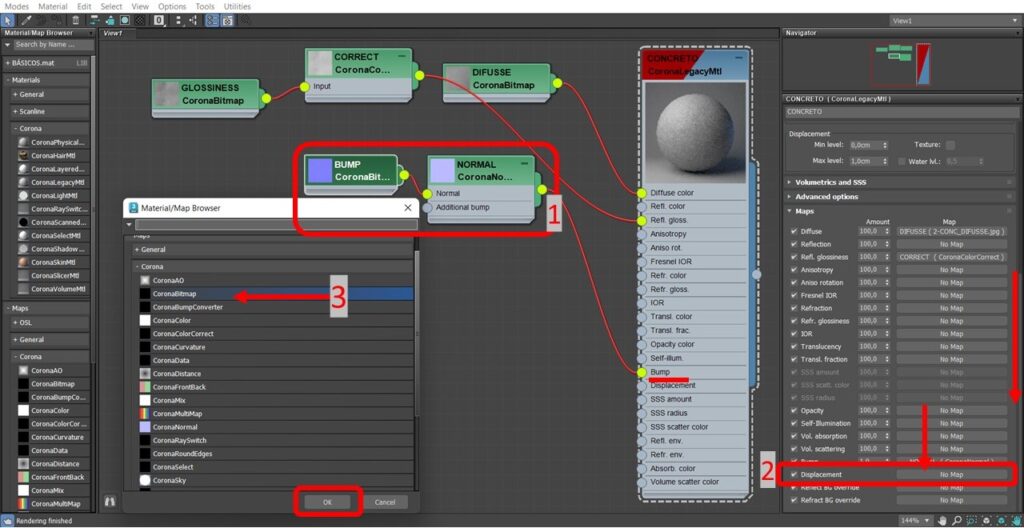
For the Displacement Map with the Concrete texture selected, slide the sidebar until you find the item Displacement.
- 2- In Displacement, indicated in 2, click on NO MAP.
- 3- It will open screen 3 where you will search for: MAPS → CORONA → CORONA BITMAP. From your files, select the Displacement map that you have created and saved.
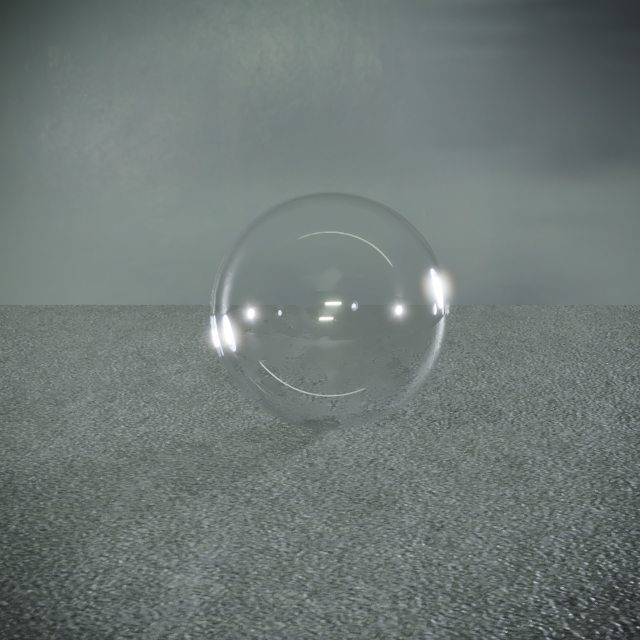
Ready! Your texture is ready to be rendered, below is some of the final result of the texture!
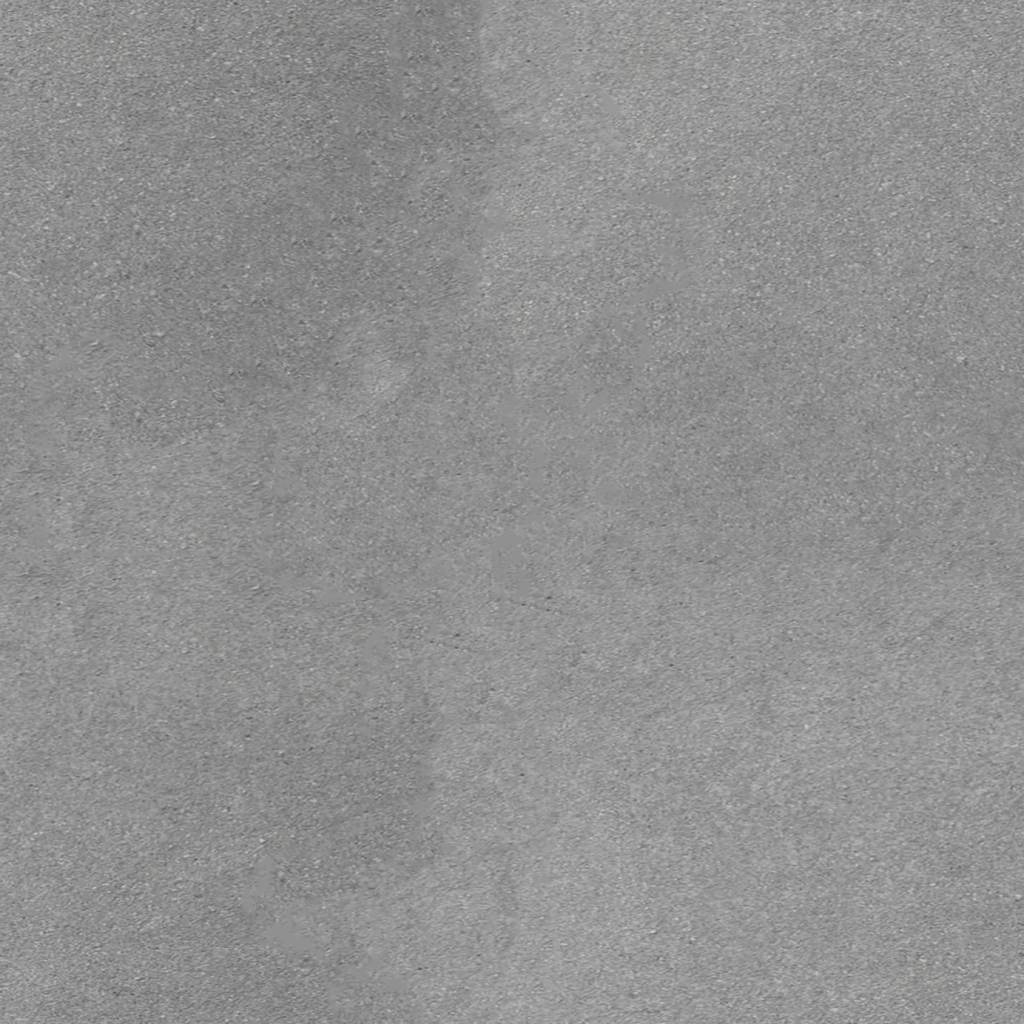
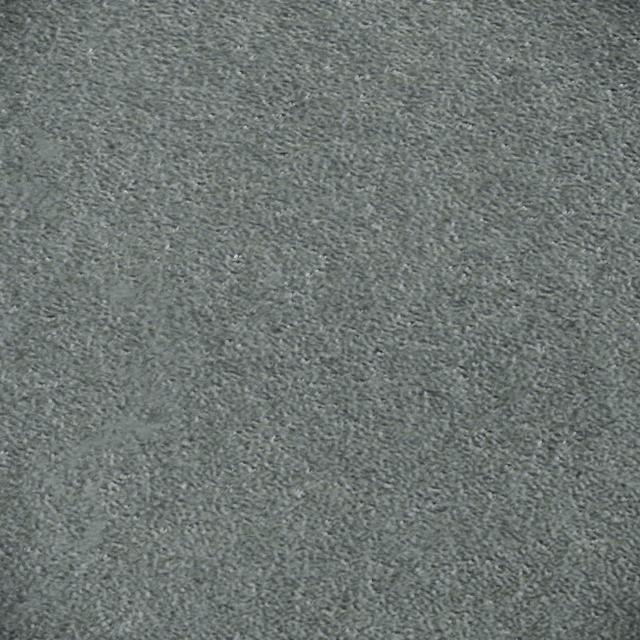
Note that the final result brings much more realism to the rendered texture!
If you still have any doubts, check out the step-by-step recorded in the video below:
Do you like the content? Follow more about, see the next blogs!


Somos um escritório de Arquitetura e Design de Interiores REMOTO que surgiu em 2023 do desejo de eternizar memórias e experiências com pequenos detalhes que fazem toda a diferença.
